
Are you a therapist just starting your career? Or have you finally landed the job that will launch your private practice and now it’s time to start bringing in the clients? Either way, a professional looking website could be your next step to jump-starting your counseling business.
Long ago, having your own website was limited to either the few people who knew programming languages or the few people who could pay someone who did. The good news for you, though, is that those days are long gone. You don’t have to be technically minded to get a website up and running any more.
But I know the process can still seem daunting. You may want to set up a website but have no idea where to begin, so you go on without one. Well, we can’t have that any more! Below I’ll lay out the steps to get a website up and running, and it will only take 10 minutes or less of your time.
Here’s what we’ll cover:
- Purchasing a domain name & hosting account (for cheap)
- Setting up your hosting account
- Installing WordPress (I’ll explain what this is)
There are many different ways to set up a website, but I’ve found the easiest way (and the one with the most control and flexibility) is to use WordPress. WordPress is a blogging framework that gives you all the structure and features needed to create content and publish it to a website. It’s simple to use and it’s extremely popular, even the pros use it. The site you are on now is built on WordPress!
Step #1 – Purchasing a Domain Name & Hosting Account
Choosing your Domain Name
A domain name is the address that people will use to get to your website. The domain for this website is createmytherapistwebsite.com. Your domain name can be your own name, or if you have a brand for your therapy services, you can use that. You’ll also want to make sure that the domain name is available. I’ll show you how to do this in the steps below.
Setting up Your Hosting Account
A website is made up of a bunch of files and images and they need a place to “live”. That’s what a hosting account is. You need a place to “host” all the assets that make up your website and there are many services out there that let you do this. However, based on my own experience building sites as a freelance web designer, I recommend a service called iPage. Here’s why I think iPage works well for most people:
- They are affordable. Most hosting accounts start around $1.99 per month and come with a free domain name.
- They are easy to use. The control panel is laid out nicely and I’m easily able to find the settings I need.
- Easy Wordpress installation. Installing WordPress (the framework of your website) is achieved in just a couple clicks and iPage walk you through the entire process.
- Great customer service. They are there if you need them and pride themselves on helping people.
Get Started: Click here to buy a hosting account with iPage and get a free domain name. I’ll walk you through the process below.
iPage Step #1
Click on this link and then click the big “Sign Up Now” button. They often have introductory offers, and these can change from week to week. At the time of writing this blog, it’s at $1.99 a month which is a great deal.
After you click the button, you’ll be asked to choose the domain name you want to use. Check off “register a new domain”, enter your desired domain name in the field and click “Check Availability” to see whether that domain is available for you to use with your hosting account:
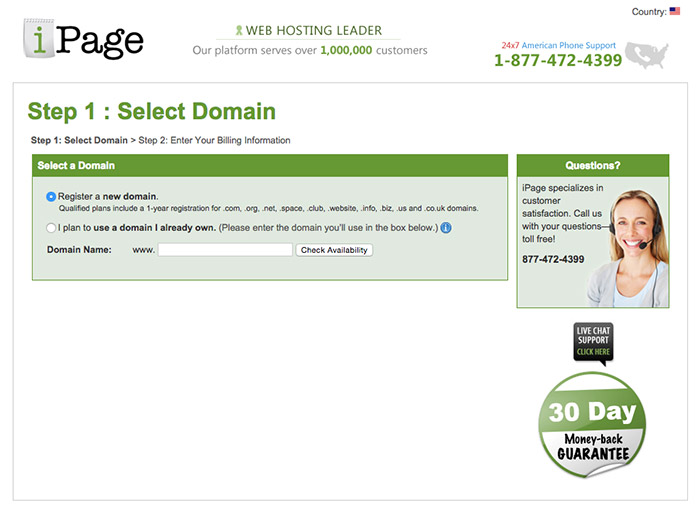
If your domain name is available, you’ll get a message in bold saying something like “createmytherapistwebsite.com will be live on iPage in just a few minutes”. Victory! If the domain you want is not available, you can try some other options until you get the one you want.
iPage – Step #2
Enter your billing information to purchase an account
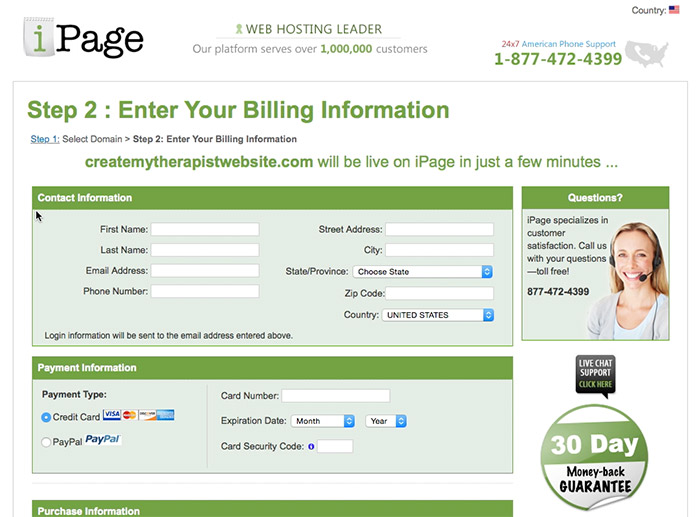
TIP: I never purchase the “Domain Privacy”, “Website Essentials” or other extras listed on this page and the next. You can just stick with the simple hosting account without the extras, but it’s up to you!
iPage – Step #3
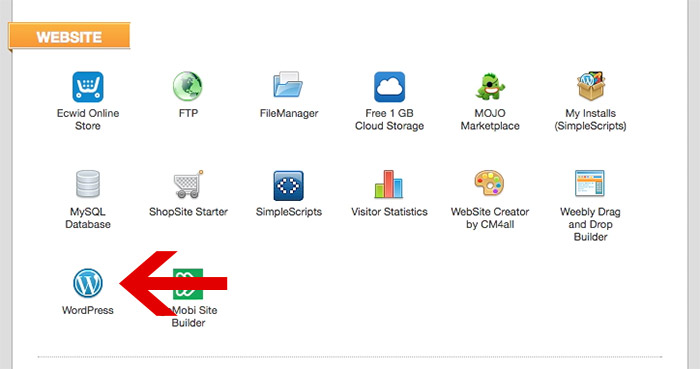
Set up a username and password for your account, log in, and your hosting account is all set up! You’ll see what’s called the “control panel”, which looks like this:

iPage – Step #4
Install WordPress by clicking the logo in the “Website” section:
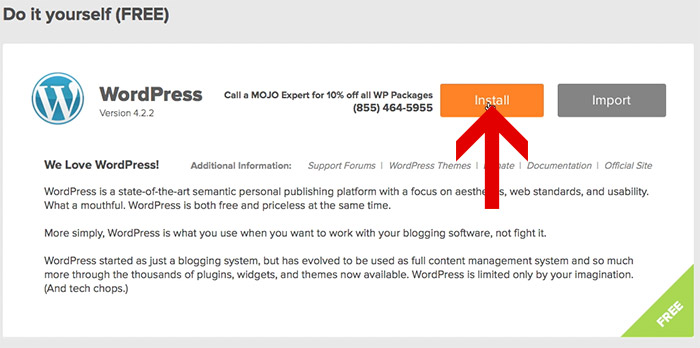
iPage – Step #5
Click the “Install” button in the FREE section
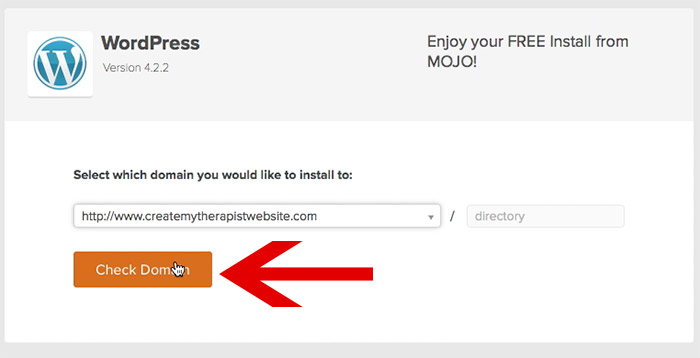
iPage – Step #6
Click on the “Check Domain” button
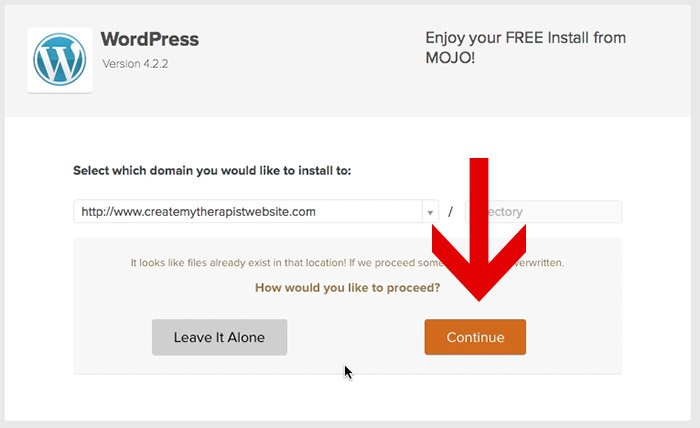
iPage – Step #7
Click the “Continue” button on the next page
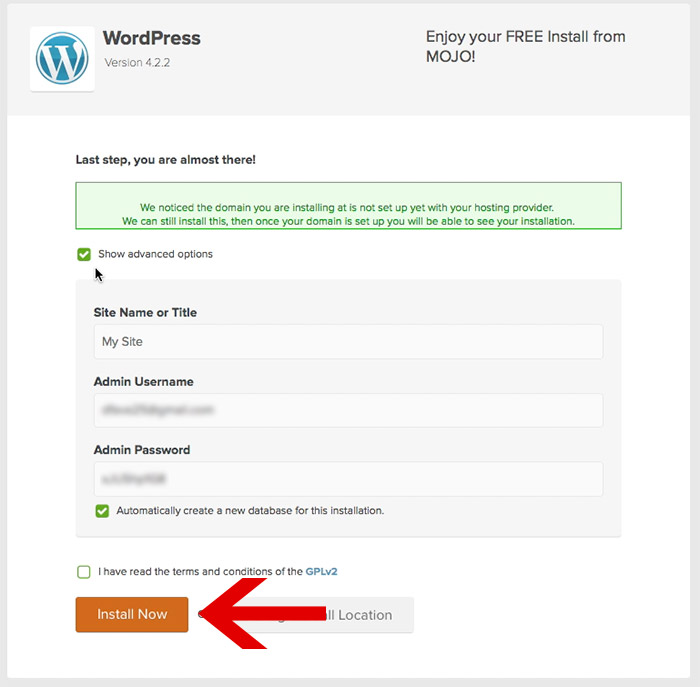
iPage – Step #8
Click on the “Advanced Options” checkbox and fill out the information. This will be your login for the WordPress dashboard.
TIP: Save this information somewhere because you will need it often!
Then click the terms & conditions checkbox and the “Install Now” button.
iPage – Step #9
Let the installation run. When complete, you’ll see a page that looks like this:
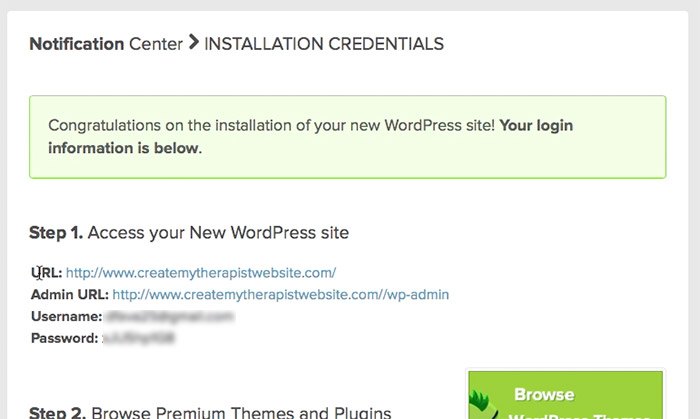
iPage – Step #10
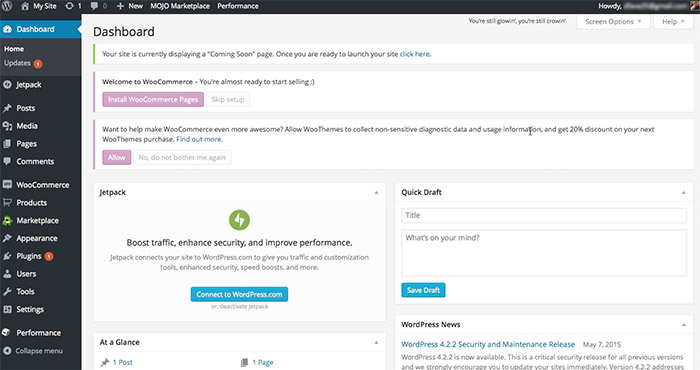
Click on the Admin URL to get to the log in screen for WordPress. Use the info you entered in step #8 to log in to the dashboard. Here’s what the WordPress dashboard looks like:
Final Step – Installing a WordPress Theme
This is where you get to make your website look like a professional, functioning site. WordPress allows you to change the “theme” of your site. There are many free themes out there, but in my experience, they have only lead to headaches. So I recommend purchasing a theme from Themeforest. These themes are designed and built by professionals and they come with many options to customize and even technical support, should you need it.
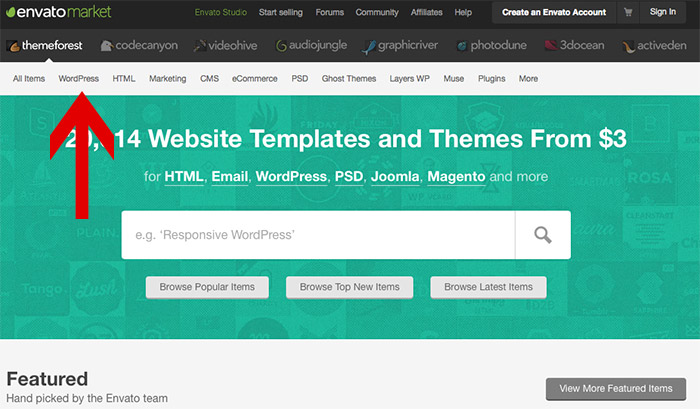
Go to Themeforest and click on WordPress.
Choose the category of theme and then browse until you find one that fits your style. You can look at the live demo of the site to see if you think you can easily populate it with info for your private practice. Once you find a theme and purchase it, download it to your computer. Now it’s time to upload it WordPress.
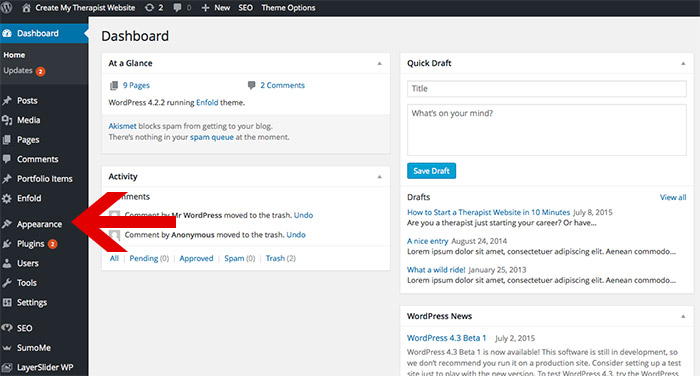
In the WordPress dashboard, click on “Appearance” in the left navigation:
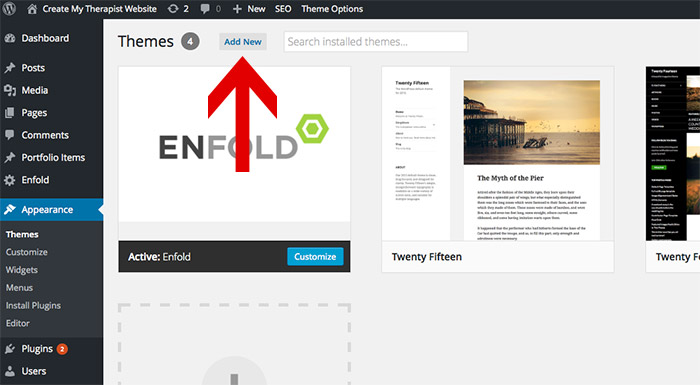
Click on “Add New”
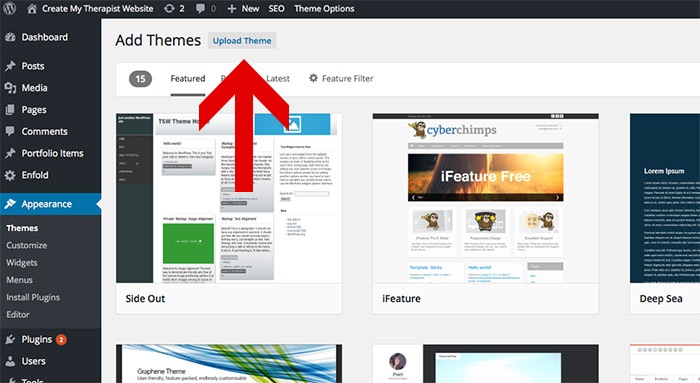
Click on “Upload Theme”
Follow the instructions and upload the zip file of the theme you bought from Themeforest. Once uploaded and activated, you’ll follow the instructions from the creators of the theme to customize it. This is where you’ll upload your logo, change the colors and fine tune it to your needs.
Having Trouble Uploading Your Theme? Watch This:
Congratulations! By now you should have a fully functioning website. Now the fun part can begin and you can add your own information about your therapy services and start bringing in the clients!
Any questions or issues? Please leave a comment below.
[av_sidebar widget_area=’wordpress-course’ av_uid=’av-budgj’]
